Welcome to Growbox Hill

Welcome to Growbox Hill
Welcome to Growbox HIll!

Wednesday, April 30, 2014

Seed tapes

I was talking with a dear friend today about a new home and their wee girl and gardening. Considering the time of year I was suggesting some plants vs seeds.. and it struck me that a very kid friendly project is making seed tapes.

Seed tapes can be made year round. All it takes is some tape, flour glue and seeds. And it's great for very little seeds that like some spacing, like carrots, beets, lettuce, spinach, radishes..

What you need:

Flour and water for glue. The consistency depends on the seed. Bigger seeds like beets, some spinach or radishes need a thicker glue. Smaller seed like carrots or lettuce can use a thinner glue.
Cheap paper, like cheap toilet paper, paper towels, or crepe paper streamers left over from whatever.
Seeds! That whole bucket is seeds I want to keep making seed tapes with.
A little dish to pour your seeds into. Makes picking them up much easier.
A marker- to write the seed name on the paper with.
Something to work on. I'm using a brown paper bag here. markers can write through the paper super easy, and the flour glue can seep in pretty quick too.
And lastly, something to lay the tapes on while drying. I'm using a stack of cooling racks, but you can use paper bags or news papers. Keep in mind those tapes have to lay till dry, which can take several hours.

Little bit of flour. This is a couple teaspoons maybe. You don't need to make a lot of glue, it does not keep well.

Mix with a bit of water. This is thinner than pancake batter.

Lay out a piece of paper. I like using 4 squares at a time.

Write the name of the seed on the paper. Be careful, the stuff likes to tear.

Drip out little drips of glue in the right spacing. For this spinach it's about 4 inches.

Drop on your seeds into the drips. This one called for 3 per spacing.

The seeds sitting in their drip. with bigger seeds like this it's nice to gently press the seeds into the glue. For smaller seed like carrot or lettuce, that's usually not necessary.

Set your paper aside to dry.. And on to the next one :)

Here's some seed tapes that are done already. If I have the seed envelope, I like to keep it with the tapes for helpful information when actually putting the seed into the garden. And wrapping a sleeve around them makes them more manageable.

When time comes to plant the seed, just lay it down, cover it with a thin layer of dirt to keep the paper in place and give the seeds their proper planting depth. Water in well and treat it like any other direct seeding.

Some notes on flour. You can use any kind of flour. I've used wheat and found it made a thicker glue, good for beet seeds. If you want to, you can add food coloring to your flour when you make your tapes to help you ID them :) Or just make making seed tapes more fun for kids.

You can do this any time of year. It's kind of nice to do them in the winter when there's no hope of any gardening, but you can still feel like you are planting seeds.. sort of...


Tuesday, April 29, 2014

Chives...

Yesterday I was looking out the window, watching the breeze ruffle the clumps of chives growing above the grass. Then I figured it would be nice to go pick some of that stuff.

I ended up picking about a pound and a half over the course of 10 minutes, heh. I used a kitchen shears and snipped them off about 2 inches or so from the ground- right where they were growing plush and above the grass. Filled my large basket about 3/4 full. There is more growing out there, but I figured I better figure out what to do with what I picked already before anything else.
They were growing in thick clumps, so I was cutting hanks about an inch or two thick at a pass. 

I rinsed them and layed them out nice on a towel to dry a bit.
Then I made a simple oil using a big bunch of chives and olive oil. Used a pint and a half wide mouth jar. Poured in a cup of oil, filled with chives, muddled the chives a bit with my pestle, then another cupish more oil to fill the jar up a bit. Cap and sit, shake every day for a few days.
What was left over still stuffed a gallon ziplock. 
Today, the 28th,,,
I made a pound of chive butter using 3/4 cup chives in 1 pound butter. Lined a 6 inch square pan with plastic wrap, filled it, plastic wrap on top to help smooth it down, and into the freezer for a couple hours. Then I pulled it out, cut into eighths, wrapped up and into a freezer bag with the air sucked out.  Dried 3 trays of chopped, wasn't positive if I would like them dried or not. If I do, I can make more. And made a pint and a half wide mouth jar of chive vinegar. I large chopped about a cupish of chives, filled jar with white vinegar. Shake and sit just like the oil.
Using a bunch tonight in dinner- chicken and mushroom risotto.
And I still have a half pound of the stuff sitting in the fridge to use! Gonna make some boursin-style spread tomorrow :).

Some pics :)
The gallon bag after I had taken out the top chunk to make chive butter. The jar there is the chive oil I set up yesterday.

Chive oil on the left, the chives left long and muddled in oil. Chive vinegar on the right, using rough chopped chives and white vinegar.

Chive butter, right out of the freezer.

Chive butter after it's been pulled out. Line the pan with plastic wrap, fill it, then another layer on top. Makes pulling out the whole thing this neat practically goof proof.

The butter after being cut into eighths. I thought a whole stick of the stuff might be too much, so make them half sticks. Made sure to note this on the bag when I labeled it.

I'm thinking about trying out just freezing the stuff too. It wraps up pretty nice and tight to tuck into the freezer, and a few bundles might be pretty nice to have handy. 

In some tippy and friends... The wad of foil in the chippy pipe seems to have worked. That thing hasn't been touched. We had another chippy warning in the solarium, so I let the cats loose... and nothing. I think I have isolated an entrance thanks to a couple of cat pounces, and today I stuffed that crack with foil. I figure it might be a good enough seal off stuffing for now.
All the local birds love my suet mix. Grackles and red-wing blackbirds are still being bully piggies.
Squirrels have been really non-show so far this spring, which is unusual. I'm not complaining since they are usually more pests than welcome.. but still, the lack of them is sort of odd.
The one swan on the pond this spring has been floating around, chasing off geese. Seen more herons early on this spring.

The 29... Picked more chives today. Not quite as much as the other day, lol. Set up a full dehydrator, made a small jar of chive and peppercorn infused vodka to try with bloody marys, and a big container of boursin style spread. Yum! And I have a bunch of chives leftover for a few days of cooking additives. Or perhaps a small batch of garlic and chive jelly :)

 This is what a clump of wild chives looks like. See how nice of a tuft it is sticking up above the grass? Makes it really easy to ID :)

This is the second picking, about half of what I picked the first time. Weighed in at 9 ounces. So maybe I picked about 20 ounces the other day instead of 24. Still, think about how many of those little plastic boxes or wee bundles of chives you would have to buy to make a heap this big. I think it would be 40 .75oz boxes to make 30 ounces, at 2-4 bucks a box? `And it grows in my lawn, 100% chemical free, for zero dollars.

Pulled the heap out of the basket to better see what a big ole heap of chives that is! On the dehydrator sheet is the tail end of what I picked on Sunday. For small chopped stuff, I like to load the jelly sheets, then put the sheets onto trays. Otherwise I always drop stuff onto the tray below, lol. A full dehydrator will yield 2 ounces of dried chives.

Decided to make a small jar of rosemary oil today too- the plant is rather healthy and just coming into bloom, and I want to start encouraging more branching. 

And today I think I saw an oriole! It was more of a pale orange instead of the bright orange, but it for sure wasn't robin colored. It was pecking at the watermelon rind. So I promptly tossed a handful of dried watermelon into the rind along with a dollop of apple jelly, filled a couple small jelly jar feeders, and set up a bigger jar feeder filled with dried watermelon and cantaloupe puree.
I have a dirth of easy orange in my home, lol. I just needed a little orange for the opening of the jar to signal to the orioles, and just had squat. I think I will need to keep my eye open for some cheapie orange placemats or something to set up some more feeders.

While wandering around today picking that second basket of chives, I noticed the garlic is looking absolutely splendid! The potato bags tops were blown over, so I put the tomato towers in upside down in the middle of them to help keep the bags open so they can get water and sun to grow. The Alaska peas are looking healthy- no wilting back or looking mashed. The nasturtiums were looking pretty good too. Noticed a couple patches of spring bulbs in random places I don't really think I've seen them before. I think the daffs in the sanctuary are starting to naturalize a bit :) We have three kinds of tulips blooming in the fence border. Small and kind of weak, but there. And the parsley is growing in just great!

I still need to get off my butt and make the seed tape demo. But right now it's time to go figure out what to make for dinner :)


Friday, April 25, 2014

More seeds?

Today, the 22nd, I was able to get out and pick up my second small greenhouse- it was the last one they had and it was on sale for 10 bucks off, costing me 25 bucks. Worth every penny. Now that I have a pair of these things, I have pretty much doubled my potting space, can work out the batches of what needs to go where when... with hardening off capabilities... The plants are in goodly sun, so no leggies :)
This second one has some nicer assembly, and came with a screen and blackout cover- but their clear cover sucks more than the first one I picked up. I was smart this time and used a piece of leftover bailing twine to tie the darn thing to the railing. I put it on the ground level back to back to the one on the porch. Filled the bottom with milk jugs filled with water too. It's now filled with the peas- those got moved to the top tier that has more head room. And lots of various flowers, mostly columbine. I'm hoping for a lot of those to spring up nicely this year.
I potted up a whole flat of Dwarf Taylor Bush Beans- 18 of them. I decided to direct seed the Masai Beans this year. I'm hoping for a bit of stagger out with production and CMA for spring weather :)
Potted up 4 mushroom tubs of lemon balm- still haven't been successful with getting the stuff to grow well from seed.
Potted up a dozen cups of parsley. I wanted to have at least a few parsley plugs ready for when I put in the tulip bulbs. In a couple years I'm hoping that whole front stretch of fence will be filled with spring tulips followed by a 50 foot hedge of parsley every year. Seriously. We use tons and tons of parsley, I want a whole frigging hedgerow of the stuff. And if I got extra, no problem, I got friends that use it too and might like a big jar of the stuff now and then. Dill hedgerow is next :) 
Speaking of hedgerows.. I got 48 plugs of German chamomile that are growing beautifully in their greenhouse. German chamomile is more often used for tea. It is also a bushy annual that can grow up to 3 feet tall! The chamomiles in the fairy garden are Roman, the kind that only grows 6-12 inches tall.

The 23rd... Cool, sunny, low breezes.
Decided to open up the upper greenhouse today after the frost last night. Time to harden off some nasts for their planting spots.
I still have some cantaloupe and watermelon sitting around... I gave it a great deal of thought, and decided to freeze up some puree for warmer weather drinking that is going to be coming up soon. Figured why not, granita's exist.. now a days we have freezie packets of drinks... I would experiment with some freezing up non-alcoholic purees to mix with whatever or not at will :)
Decided to make some simple syrup today, and try bags of fruity goodness tomorrow. I made a minty one for the watermelon, and plain for the cantaloupe.  I tossed in a handful of crumbled pineapple mint leaves I had on the shelf to the red syrup once I took it off the heat, and let it steep till it was about the temp of a cool cup of tea before I strained it off to go into the fridge- I didn't want to oversteep or have bits of shit in my final puree. I used my gold mesh coffee strainer to pour off the mint after it was done being diffused. Used food coloring to tell them apart and impart extra color to the final drink, lol. Tomorrow I will puree the melons, add the syrup..
And I'm using bags to freeze!
Why not? Why have to use a pan for crystals? The freeze drink packs are bags, right? I'm going to freeze up the puree in bags and just manipulate them every couple hours, just like one would with a fork to break up a pan of granita. Then when I'm happy with crystals, let them sit for final freezing.
I've seen a  couple days for "curing", and up to six months or so in the freezer if one is careful to get air out of the bags.
While looking around about this I came across several nice accounts of an expresso granita done in bags, yum!

Did a little cleaning up and some potting today. I discovered after a loooong and apparently fruitless wait.. a couple of my rose seeds are indeed sprouting! I moved it's seed plate to a much more spring sprouting conducive sort of situation. I set those up waaayyy back in a pair of plates with wet towels to stratify them sort of while it was still cool enough in the solarium. Today I pulled out the plates to chuck the contents and try another sprouting test and lo! A few cracked and sprouting seeds :)
I potted up the 4 pits from methyel plums I had sitting. Will see what happens. I just used little cups for now.
Potted up another big pot of sprouted onions. For the last month or so, the tail end of onion season has shown, and a lot of sprouted onions in the bag very quickly. So I pot them up just shallow enough to let them root, dirt on top just enough to bury the bulbs, and start cutting onion greens to add to dishes.
Made a fantastic tuna loaf tonight too.  It used undrained tuna in oil and drained water tuna, and used matzo meal.. A wonderful kosher recipe I found when I was tired of looking at regular tuna loaf recipes. I bet this one would be good to do sliced cold or cold and seared off too.. Hmmm, something for the raclette grill I got recently from my mum in law. It has just been sitting in her basement for ages, and when over there recently, she remembered to dig it out.

What is a Raclette Grill? A really fucking awesome tabletop cooking device. On top is a dry searing griddle, in the middle a heating element, and underneath space for little pans to sit and broil. It isn't huge- think one medium egg in one of those little pans. Or one hunk of the right kind of melting cheese, yum. And yes, dry searing only- not meant to fry up some bacon or big ole burgers.
Oddly enough, over the last few months before my mum gave me the grill, I had picked up a couple interesting old cookbooks on tabletop service. My sister has been asking me about tapas, and I have some cookbooks into that realm. Some family dinners soon has got to include the rachlette grill.
Heh, I'm thinking it might be entirely possible we set this sucker up out on the picnic table this summer and just run a cord out to power it.


It's Friday :)
Yesterday was a super gloomy, sit around and do research kind of day. The usual stuff, cold case crimes, spooky stuff, gardening and food things. I tried a new kind of hamburger steak sort of thing. Used Kefta spices in the hamburger meat "steaks", and a mushroom, onion, and carrot braising sauce/gravy. It was really good. The steaks were almost kind of like nutmeggy, and more, but not overwhelming. I remembered to write it down as I made it so I can make it again. I'd be more likely to serve it with couscous, quinoa, or maybe a flatbread rather than mashed potatoes. Mashed taters were great.. but not quite right with the rest of the textures and flavors.

 I did end up making the frozen melon purees- today. Didn't take pics, it was pretty much just chunks of fruit in a blender, then I stirred in the simple syrup. Measured out into 2 cup measures into quart freezer bags, and just mush up every once in a while while freezing. I also had 3 bananas sitting just at the point of bread, but didn't feel like making banana bread, lol. So those I peeled, cut in half to fit into the quart bag, and tossed into the freezer too.
My little seedlings in the greenhouses needed to be re-arranged today. I'm using the upper one as a hardening off area, the lower one is staying closed and toasty warm. I'm considering planting my pea plants tomorrow since it's supposed to be rather nice and sunny followed by a few days of mellow temps with overcast and maybe rain. If I need to, I have the materials on hand to tent them. I think I might clean out the great room pots and plant in the papaya cream and nasturtiums too. Perhaps some of the milkmaids in the fairy garden.
Peas on the top- Alaska peas to be specific. The nasturtiums are on the bottom. The three pots that don't seem to have much going on are cherry nasts- biggest seed and I think they were pokey last year too when I direct seeded them.
Yes, those peas are darn big, and temps are now rather cool- and don't you just direct seed? Well. I wanted to get in a spring pea crop as early as possible since I was planting in honey rock melons and a couple kinds of cukes on that same fenceline later on in the season. And I wanted to give my plants the best chance of grabbing on to the fence AND try to keep the seed eating critters not interested. And the whole pea trench is still pretty darn wet. And I want them to already have a standing chance against any weeds I might miss. I plan on using straw on the pea trench at least to bed them in nicely.
The pea trench is this bed I set up/dug out recently:


What about all the leaves and stuff still sitting in the yard? Those are going to get gathered up as a layer in the lasagna bed that will be built to grow the tomatoes, peppers, and bush beans.

With the upcoming rainy but not frosty forecast going on it will be time to put out some more seed tapes down. It's better to put them down when it's going to be damp, lol. And I've been making more seed tapes again. Over the next few days while I make some up I will be taking a photo tutorial to share :)
And it means laying in the earliest of the brown paper bag barrier. We have been saving them since day one, and I want to use them to start smothering off the border of the tulip/parsley bed that will be going in in a few weeks, and perhaps the next section after the pole for a future dill bed. And of course the earliest stage of the lasagna bed. A refresh of the shredded paper mulch on the garlic bed.

It was time to make bread again, and this time I remembered to take a nice pic before it got all sliced up and eaten.
The glass dish I got for a couple bucks at a resale shop while out with T one day. I wasn't sure to get it, but T told me to go for it, and I'm very grateful she did! It's a perfect 2 pound loaf that I made the dough in my 10 dollar brand new bread maker I picked up resale shopping recently. Slices barely fits into our toaster, lol.
Why use a bread maker but bake it off in the oven? Quite often kitchen situation isn't great for good mixing and first proof- breadmaker on dough setting takes care of that.And even with taking the paddle out, bread has a funny hole in one end.. and it bakes up not quite right for me. Oven loaf is waaaaay better. More even better shape, the crust is all around better. And no hole.
I want to make it a goal to bake at least half of our own bread needs.. Kneads?.. by the end of the year. Like regular sliced bread, dinner rolls, maybe even pitas and tortillas.

Monday, April 21, 2014

Spring beds are a pain in the...

It was a glorious and sunny Easter Sunday. In the 70's, nice breezes.. A little too sunny, got a little pinked, hehhee. Today was just as warm and nice, but sort of overcast. So it's been a couple of days in the yard setting up some spring beds.

First off, a couple pics of how nicely the plants on the front porch are doing:
The greenhouse is full kales, peas, nasturtiums, chamomile, sunflowers, and alyssums..  Bless my little greenhouse- this was well worth the 28 dollars to be able to pull out this much from the solarium to prep up for planting! The litter buckets are full of dill. In the big black tub is a trio of sad hollies that I got on clearance- I hope they spring back. In the little pots are the second year lavenders. And a very small pot of great shady groundcover Dawn gave me that survived the winter.

This is looking down the hole of a milk jug at a mass of wildflower mix sprouts.

On to the beds. First I raked out all the leaves to the end of the stalls, general cleanup. Then I started with setting up potato bags, and actually remembered to take pics along the way... I used 45 gallon contractor bags because that's what I had in the house.

Heap of materials- once I remembered to start using my camera, heh. The brown mat is the cocoa mat stuff used in baskets. I used this as the bottom layer in my bags. It's a 3 foot square cut into quarters. In the wheelbarrow is straw- I used about half of it making a layer under the bags for insulation and to have something the bags can leak out onto. If I put them right on the concrete I pretty much negate making drainage cuts. I hope between the cocoa mat and straw flakes it makes a good base. In the smaller bags are my see potatoes.

This is the beginning of the bed. Why did I put it into a stall? Because if the bags get unruly as they get bigger, I can tie them up to a wall as needed. I put down a layer of straw flake on the concrete first, then started with the bags.

I cut several slits across the bottom of the bags, put the mat in the center, and away I went...

This is almost done with setup. On top of the cocoa mat went a flake of straw, busted up and fluffed. Then a couple of buckets of manure compost, then another flake of straw busted up. Heaps are about six inchesish inside. Time to lay in the potatoes!

Adirodack Blue..

Australian Fingerling..

Pontiac Red...

Kennebec.


Of course I didn't just leave them on the straw! But pics after they are buried is pretty pointless, heh. I snuggled them down into the straw so they were in goodly contact with the dirt. Then a nice bit of leaves over the top for extra coverage. Hopefully now it's just sprinkle in a bit of dirt and a heap of straw till the bag is full :)

On to the next bed...
The other day we cleaned out the fairy garden, and three+ large barrows of leaves got dumped at the end of the stalls, just like I did last year. Only this year was even deeper and a bit wider. I just took shovelfuls of composted manure and carefully dumped it over the leaves to compact them down. Now it's wait a couple weeks for the bed to settle till it's time to put beans and squash in.

That was enough beds for Sunday... I was feeling a bit pink and so decided against busting into the fenceside bed. Set out the beginnings of the next chunk of bottle border and did the weeding out of the area of the fairy garden where I want to plant in some of those milkmaid nasturtiums.

So today was Monday and since it was so nice out today, it was time to crack open the fenceside bed. A project I was not looking forward to. But not using that side is just a total waste of great growing space. But it meant moving the compost pile, at least a bit.. whine, whine..


This is what the heap looked like before. One side mostly manure that is getting dug into, the other mostly where I've been dumping tons of scrap for the last couple years. I wanted to open up a channel on the fence side and plant in my early spring goodies, but sooo didn't want to really start moving manure yet.

Here's what it looked like once I was done cutting my channel. Dear heavens it was more work than I anticipated. There was a 1x6 board longer than the whole area buried about 6 inches or so under the surface. So just once I thought I was getting done with the preliminary dig in, I hit this big ole board. It's slotted on both sides so maybe it was an old piece of siding or flooring. It became the bottom board in my little retaining wall. A couple other yard boards went in for a top layer to help contain the manure mountain. On the bright side, ripping out that board broke or snapped a great many nasty ass roots of stuff, so I'm hopeful this might have helped kill off some of that. When it comes time to put in my peas, I will break open another straw bale and nestle them in.
Now, I don't plan on that wall working forever. The pipes holding the boards in place are just hand crammed in, and trying to garden over a hill is a PITA. I do plan on training the plants to be inside the fence for picking as much as I can. But I think quite a bit of that pile is going to be moved to create the beds for the tomatoes, peppers, and bush beans. Eventually I think that side will become a whole bed much like the end has.
Of course this will mean a moving of that particular compost area to another part of the yard, and I already know where I'm going to relocate it to- the raspberry bed. It's a mostly gravel base, and the few raspberries there suck. So out they go and compost area goes in. I think eventually if the area can be built in right, it might become a raised bed for asparagus.
I've been thinking a lot about veggie row over the years, and now I'm sort of settling into the notion that the bee patio area will become more of a set it and forget it beds like asparagus, garlic.. stuff you don't have to tend quite as much. This years beds of tomatoes, peppers, and beans are going to be built up on the other end of veggie row, closest to the house.
Not all of my tomato and pepper seeds came up. Three kinds of peppers and a couple kinds of tomatoes. But all my pots of pepperonchini came up and seriously need some dividing- hoping to keep every single one of them. Canned goods last forever, so I'm hoping for as huge as possible with this one. And the manzano is the other pepper that is coming up. Which is extra nice, because this is the one pepper that isn't really a pepper and so will not cross with my pepperonchini- I know I will get pure seed :)
I can deal with the non sprouting of a couple lines of tomatoes- just means I can concentrate more on the ones that came up. Need to divide a couple of those too while I still have a really good chance of doing so. When my sister is out next in May, we can set up the beds for those.


Hmmm, much done, and many plans to come..


Thursday, April 17, 2014

Spring rolling.. or not?

It's the 17th, and it feels like a nice spring day today- after it being chilly as hell the last couple days, and more chill to come... It's that indecisive time of year, lol.

Decided to move some of the nasturtiums out to the mini greenhouse today while it was warm. 3 Milkmaids and 2 Papaya Creams. Leaves me a couple backups in the solarium just in case this was a really bad idea. But the kale sprouts have been pleased as punch in there.
I took out a half dozen of the milk jug greenhouses from the mini greenhouse to make room for all those nasts- and a couple gallon jugs of water. Filled them up warm and they should be better heat traps in there than the milk jug greenhouses. And full jugs are heavier. All the milk jugs have little flower sprouts in them, hooray!
Let's all keep our fingers crossed now and hope that the wee nasts do well in that little greenhouse!

I experimented with making bird suet yesterday. It made a crapload of mix- filled up my biggest mixing bowl almost to the top. Half batch next time, fill just the pan below. Took a couple pans to use it all. I think I would do some different experimenting next time with molds- loaf pan is right out for the mix I used. It was way too chunky to slice nice after. Cake pan and thin layer worked much better.
This is the cake pan. 6 good cakes, lots of extra trim I think could mash together into 2 more full cakes sort of. Chock full of seed, grains, dried fruits, and peanutty goodness. This time I put those scraps out pressed into a hanging pan up in the feeding tree to see what happens. If the birds like it or not and if the cayenne pepper makes a difference or not. Birds are supposed to not notice, but squirrels and other critters hate it.

Decided to do an experiment in lacto-fermenting today. What is lacto-fermenting? It's how you make kraut and great deli pickles, kimchee and a whole mess of other tasty fermented things. It's full of all sorts of good stuff for you too healthwise... Things pickled foods do not have.
 And believe me, if I had stumbled onto how to do it in mason jars before St. Paddys, I would have picked up an extra head or two to try this with. Ah well, another time when the cabbage is good. Still have a lot of carrots left over after several pounds of dehydrating and a couple 32 oz jars of spicy fridge pickles. About half the leftover pile was mostly skinny carrots with tops less than an inch wide, most skinnier. A pile that was enough to loosely fill 2 narrow mouthed mason jars. I'm using these jars because I plan on being able to do this in bigger batches for canning if this turns out well. Instead of cutting sticks, I picked those out and set them up whole :) Rest went back into the fridge.
I peeled and trimmed them, only a few had to be cut in half to fit in the jar right. I tried 2 different recipes that used some different method setup and flavorings. Ended up using my own capping method because the brine bag over thing just was not working for me, heh.
See what I mean about them being skinny little things? They just begged for some sort of pretty preservation like this.
On the left is garlic on the bottom. These got rubbed well with salt and left to stand, covered with a clean cloth, for a couple hours till most of the crystals had disappeared and there was some goodly carrot weeping in the bottom of the jar. The bonnet is a clean coffee filter held on with a couple rubber bands. As it ferments, the carrots need to burp. I had read about using fine cloth of various sorts, and someone using a reusable coffee filter. I figured why not? I can toss them as needed for this little experiment, and should let the carrots burp just fine. This pickle also is a fridge pickle only. Once the burping is done I get to toss them in the fridge.
The carrots on the right were fresh pack in the carrots with a couple sprigs of fresh thyme (which is one of the only fresh bits really springing in the garden) and a cooked brine of water, salt, bay leaf, peppercorn, and a dried pepper. The black cap on top is really the cap to a smaller jar just fitting down into the neck of the big jar. I could clean the snot out of those like I do the big jars, it holds the carrots under perfectly, and is just loose enough to allow plenty of burping space and proper head gap :) The jar on the right is also written up to be able to go directly into the fridge or water bath canned once done percolating. The bowls are under the jars because they will burp and spill potentially. Now they get to sit in a nice corner and percolate for a few days.


Tuesday, April 15, 2014

Dehydrating food Q&A

So, I have spoken frequently about dehydrating food, it's all over the place in this blog. I have a bunch of friends that do canning, but I'm one of the only ones that does a lot of dehydrating, outside of making jerky :)

I get asked questions, I check back over notes.. figured it was high time to make a post about it.


So. What dehydrator to get? Should I get one or just use my oven?
I still use my oven for roast drying corn, particularly fresh off the cob corn. I like the roasted flavor of the fresh corn. If you are only planning on doing a little dehydrating or like giving roasted goodness to veggies oven can be good.
If you are planning on just a little herb drying from your garden, a smaller stacked tray with a heat element to gently waft heat up to help preserve that delicate parsley to heartier rosemary. This is also nice if you like to do dried flowers. This has the same effect as having it in a high and dry place drying, only faster and more enclosed.
If you are planning on dehydrating with any regularity, invest in an electric dehydrator. Standard must be having a blowing fan and degree adjustable heat. What's degree adjustable? NOT low/hi settings, only use stuff marked with degrees. I love my Nesco 6 tray. It's big enough to handle a couple bags of produce at a time and dry nicely. Would love one of the big square ones.
Important point- only get a dehydrator you are willing to sacrifice the space for. Don't pick up some big ole thing with dreams of dehydrating the entire yard- then get it home and realize the only place you can really set it up to run it is in the middle of the kitchen table. Or you don't have anywhere HANDY to keep it when not in use.

What about extra trays and accessories?
Absolutely get the jelly/jerky trays that have the nice little lips. Particularly if you get a model that's round or has a center pillar. Worth the few bucks.
Finer mesh screens are a must. I skipped the few bucks each for the ones made for the dehydrator and used the finest mesh craft plastic mesh and cut my own screens instead. Made enough for my whole dehydrator for the price of two OEM pieces. Yes, they are safe, and if one gets ganked, easily replaced.
I didn't bother with extra trays when I bought my Nesco, but if I saw a couple I would get them. Just to have an extra or two on hand.

What about a bunch of other cool dehydrating methods?
Like solar dehydrators, radiators, vehicle drying, how to string stuff? That will be for other posts :) 
Do I really use all the stuff I dehydrate?
Yeah, absolutely I do. At first I was a bit tentative on what I was drying with, so starting out with the oven and little dehydrator worked. Then came the point where I wanted to try other stuff, and wanted to try for as much shelf stable stuff as I could. 

Really? EVERYTHING?
Well, no. There were some mullberries that turned out pretty frigging enedible- those got sidelined for bird feed. Found out the gross way what happens when you overload a dehydrator with mixed veggies using a dehydrator that didn't have the right amount of heat moving through the trays = gross molding mess incubator the next morning. A few attempts at hurry up with the oven dehydrating that just became too toasted, lol.

So what got you started? And then what happened?
Herbs and mushrooms. I use tons of parsley, oregano, sage and so on. And like to use dried mushrooms a lot. It's the magic in magic dust, and really, when fresh ones are on clearance, they are cheaper than getting canned. I can pick up a 12 oz carton of mushrooms for 99 cents, 4 oz canned on a good deal is 79 cents at best.
Then I moved on to onion, carrot, celery. Dry up mire poix when it's cheap and in season, and in the hard cold winter you always got the basic on hand for some cooking goodness.
Frozen veggies when they go on good sale. I don't have the freezer space for it all, nor can I always rely on power to keep em frozen. But whole kernel corn, peas, and mixed veggies have dried up real well for me.

How do you store it all?
I store almost everything in recycled containers in my pantry. Glass Old Milwaukee pickle and Franks kraut jars, some large tall olive jars, a few large plastic mayo/miracle whip jars. My biggest jars are a pair of recycled dried mushroom containers that I keep using for dried mushrooms and a rather large plastic mixed nut jug that is for shredded sweet potato. I use gallon zipper bags for potatoes and large leafy greens.

How much space does all of this take up compared to fresh, frozen or canned?
Gosh, not too sure. The shelf I keep all the jars on is 46"Lx8"D with 13" headspace. It might be a bit more than the total space of my freezer by a couple jars. If all that produce in it's pre-dehydrated form were stacked up on my kitchen table, my table would be heaped over gracious plenty and beyond. It measures 84x36". More than enough to stuff my fridge and freezer at least twice in their pre-dried forms.
In some more practical terms, a kraut or pickle jar can hold 3-6 bags of frozen corn, peas, or mixed veggies. 5 pound bag of potatoes fills about a half gallon ziploc bag. 2-3 cartons of fresh mushrooms dry out to about 1-2 cartons depending on the kind of mushroom. Button, oyster, and portobello shrink less, enoki and straw mushrooms dry to filaments.
And I never have to worry about need to use up right now while its fresh, shit the power went out, or crap, canning is eating up way too much space. 

What are my favorite ways to use dehydrated foods?
I tend to use them as ingredients so this is sort of hard to explain, lol.
Shred root vegetables and use them in some of your favorite cheese or crumble on top applications. Sweet potatoes, carrots, turnips, and those other WTF root veggies. Grate them all up fresh.

I like dinner kits, I really do. I don't always want to see all the raw ingredients and figure out what to make. We do really like some stuff that easily is a kit. Like pasta and sauce, or red beans and rice.

This Christmas I decided to make some gifts in jars for folks. And EUREKA!! or maybe No Shit Sherlock.... Gifts in a jar are awesome for making dinner kits.

There are a bajillion sweet gifts in jars. But there are also a lot of savory ones too. So I started out with the notion that I would make whatever the jar was and see if it was good or not before making it up into gift form... The crackers sucked. But a couple of them have been good enough that they are going onto the pantry shelf and I want to note down the recipes.

Hearty Italian Bean Soup- this makes one batch

The Mix for the shelf- this needs to be done in three parts. If doing in a jar, part one goes in loose, part 2 in a sandwich ziplock, and the seasoning in a 3x4 ziplock.
Part 1:
1 1/2 cups white beans, great northenrs or navy
Part 2:
1 1/2 cups small shell pasta
Part 3:
1 T minced onion
2 t dried basil
1 each chicken bouillon and Golden G's
1 T parsley
1 t minced garlic
1/2 t black pepper
Bag/jar up and put onto shelf till it's time to use

When it's time to make it:
1 jar mix
5-6 cups water
8 oz tomato sauce
1-2 cups spinach, optional
1. Remove pasta and spices
2. Place beans in pot, cover with water, bring to boil for 2 min. Kill heat, cover, and let sit 1 hr.
3. Drain beans. Combine beans, water, tomato sauce, and seasonings. Bring to a boil, cover, and reduce to a simmer, and cook for 2-2 1/2 hours, till beans are tender.
3. Add pasta and spinach, bring to a boil, then cover and reduce to a simmer for 15-20 minutes, till the pasta is tender.
Serve sprinkled with fresh Parmesan cheese.

Jambalaya mix- Per bag
1 cups rice- I like using a 1/2 c each of white and brown rice in each bag.
1T minced onion
1 T parsley
1 chicken bouillon cubes
 1 Golden G's
1T dried radish, nasturtium leaf, or chives
1 T celery flake
1 t cayenne pepper
1 t of black pepper
1 t garlic powder
1/2 t thyme
Fits easily into a sandwich bag.

When it's time for dinner:
Jambalaya mix
2 cups water
8 oz can chopped tomatoes, undrained
Bring water to a boil, add mix, and drop to a low simmer, covered, 18-20 minutes.
That's all it is for the basic rice. But then there's the add ons...

You need to flesh this rice out, and can use up to 2-3 pounds of stuff to do it with.
1/2 cup of fresh sweet pepper to the boiling water before the mix is poured in is a nice starter. You could also use the same amount in celery or diced baby carrots.
Protein- you want around 1-2 pounds. This could be a pound each of chicken and shrimp, or a pound each of sausage and beans... If using dehydrated beans, use a half cup of beans and up the water to 3 cups and cook the beans along with the rice. If using canned beans, rinse and drain well before stirring in after the rice, tomato, and water have come to a boil and before covering and reducing to a simmer.

If you want to make it all vegan.. Swap out the bouillon and Gs in the original spice mix with 1 veggie boullion- the ones that are a double sized cube. Or skip it entirely in the mix, but always use a good strong vegetable stock instead of water.
If you want to use all beans, use a combo of dried and canned, or all canned. Don't to all dried, makes too dense a mass.
You can also use diced summer squash or zucchini, cubed eggplant, or quartered mushrooms that have been sauteed, mixing these in at the very end. Or Some parbaked and cubed butternut squash or smoked and diced cauliflower. You can do this to a meat version too to make up the third pound off add in.


On to some pics of what fresh vs dried looks like...


This is a series of pics of drying citrus. I zest mine before drying.


Busting up a bag of fresh kale vs what it's like dried.


This is blanched and dried asparagus. First pic is one tray of wet, then one tray dried, then what all six trays piled up to. Filled a Franks kraut jar neatly, 5 pounds fresh to jar.


This is green beans. Blanched and dried.


This is 3-4 goodly sized sweet potatoes to fill the dehydrator, and after. This fills up a big jug.


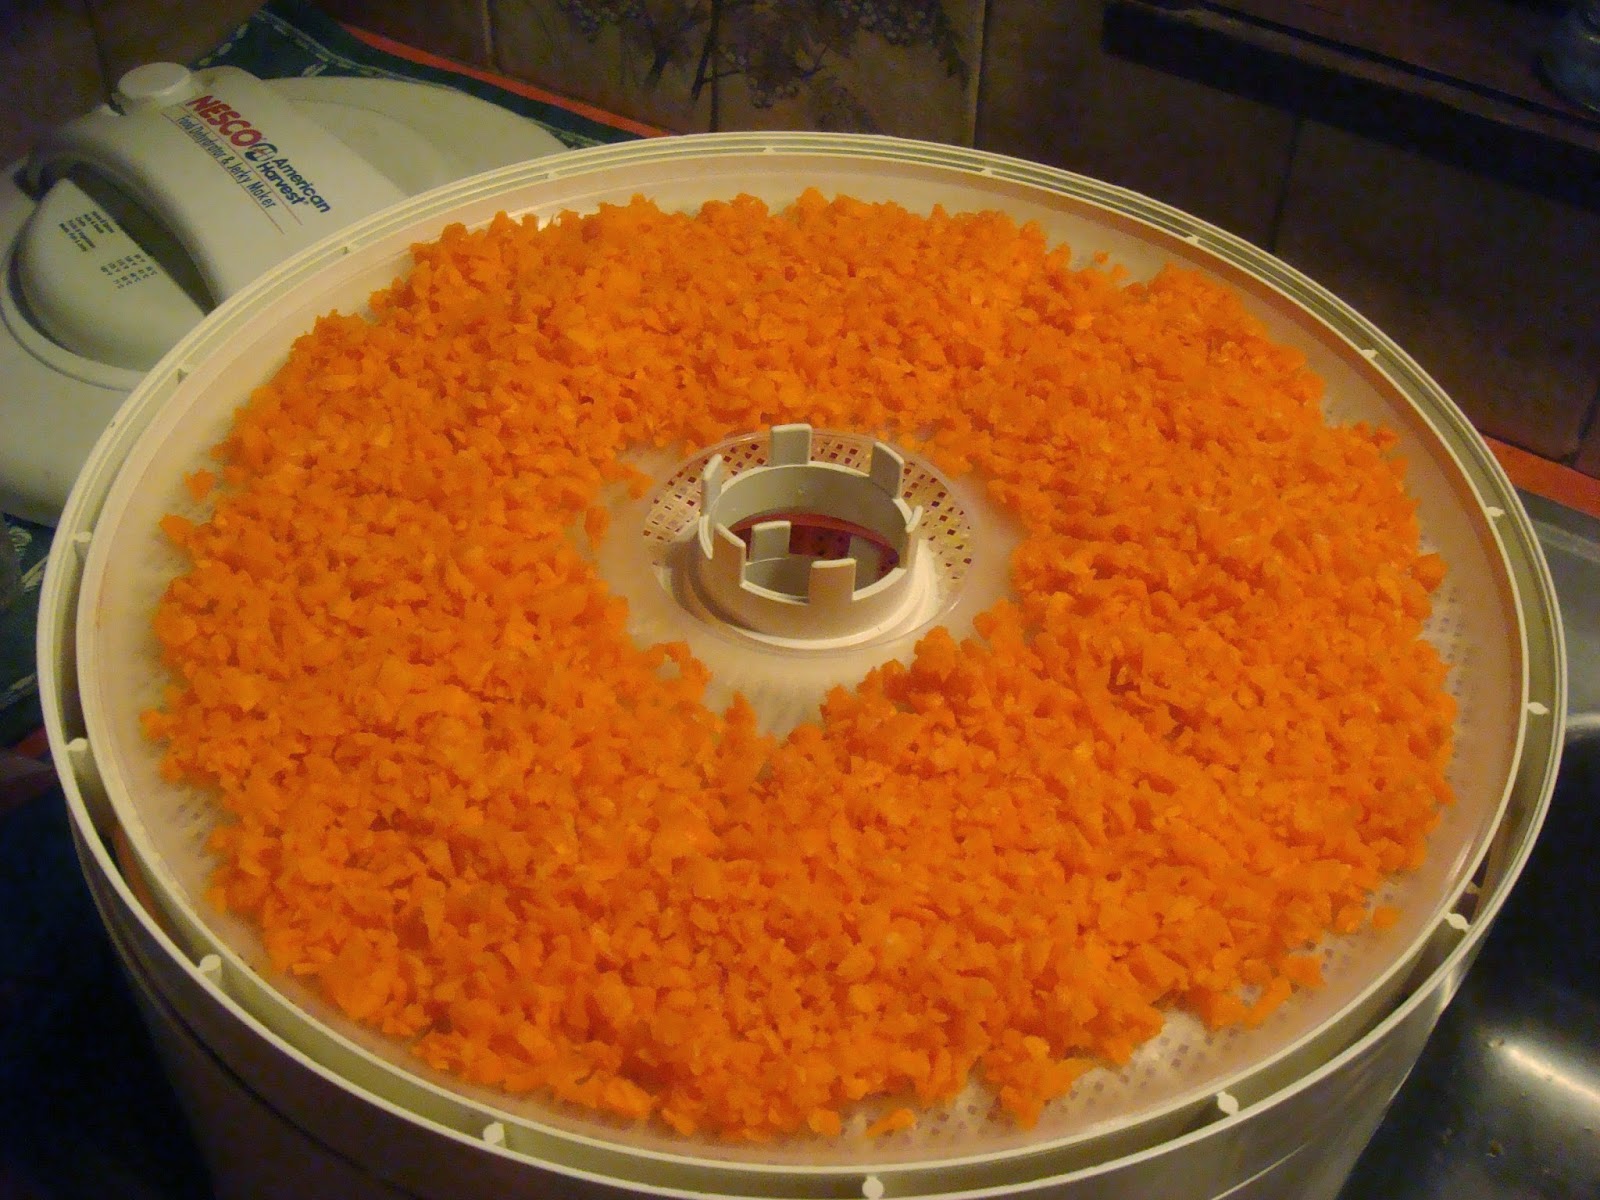
This is dried grated carrot..


More on another dehydrating posting day..